Toss the Boring Frames: How to Transfer a Photo onto Wood
 I love taking photos; I'thou a pretty snap-happy person. I just love the idea of existence able to capture a moment in time. With all the stuff we try to remember and cram into our brains every unmarried day, it's squeamish to have a photo to jog your memory and remind yous of a great time you had. Naturally, I love to brandish my photos but I've constitute that frames tin get a little irksome, so I've opted for this cool method of transferring a photograph onto a cake of woods. Information technology's just squeamish to take a little something unlike from the norm, and it gives a nice rustic feel to the area in which it's placed. These also make fantastic, thoughtful gifts.
You don't need much, just:
- A printed copy of your photograph of selection on regular paper
- A block of forest (the smoother the ameliorate)
- Mod Podge
- Gel medium
- A brush
- A wet cloth
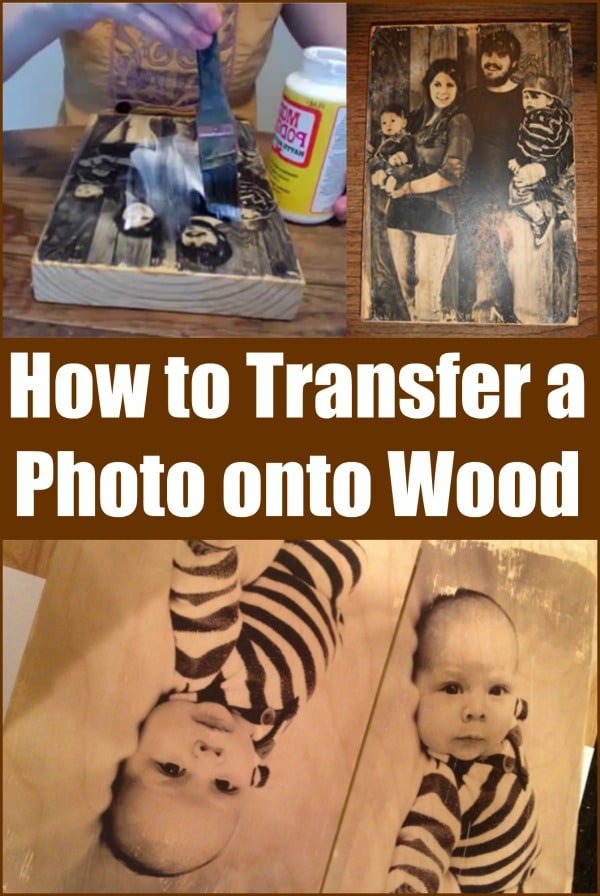
The process itself is very simple: cover the wood with your gel medium (be generous with the stuff only also make sure to spread it evenly), place the paper on the wood, leave overnight, rub with a wet cloth to remove the paper then only finish with Mod Podge. It couldn't be any simpler.
Important Tips:
When you place the prototype down on the wood it will come out reversed (or mirrored), so before you impress out your image, make sure you flip it on the computer then that it will come out correctly on the wood.
Y'all must utilize a laser printer – the ink from a regular inkjet printer will not transfer onto the forest in this way.
This method works best with a blackness and white image – colors won't come out quite likewise.
Source: https://www.diyncrafts.com/10922/decor/toss-the-boring-frames-how-to-transfer-a-photo-onto-wood
0 Response to "Toss the Boring Frames: How to Transfer a Photo onto Wood"
Post a Comment